Off-Road Line Choice Tips for Beginners: How to Read Terrain
Last updated on October 9th, 2026 at 05:57 pm
A good line can make an easy trail feel smooth, while a bad line can turn the same obstacle into a stuck vehicle or a bent skid plate. This guide focuses on one skill: choosing where your tires should go before you touch the throttle.
Off-road line choice: the planned path your tires take through terrain to maintain traction, protect the vehicle, and keep control over speed, steering, and clearance.
What is the best way for beginners to choose an off-road line?
The best way to choose an off-road line is to stop, scan the obstacle, identify traction and clearance risks, then drive the slowest path that keeps your tires supported. Think several vehicle lengths ahead, because each tire placement sets up the next move.
Beginners often stare at the obstacle they fear. Look where you want the tires to go instead. Your eyes should move from the near ground to the exit point, then back to the front tires. If you are not sure your bumper will clear a ledge, run your numbers through the approach, departure and breakover angle calculator first.
Beginner line-choice checklist before rolling
- Stop before the obstacle. Do not make your first plan while bouncing through it.
- Find the exit. A clean exit matters more than a dramatic entry.
- Mark tire targets. Pick rocks, edges, or packed dirt your tires can touch.
- Check belly clearance. Watch differentials, crossmembers, steps, exhaust, and hitch receivers.
- Choose a bailout. Know where you will stop if the line feels wrong.
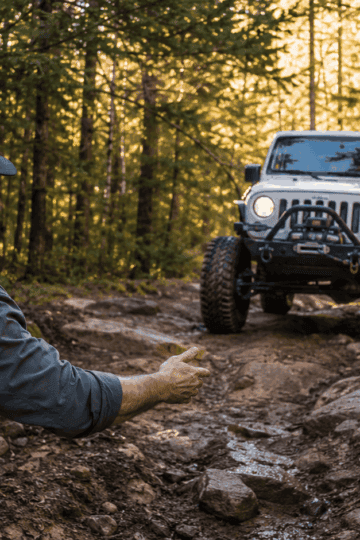
- Use a spotter when visibility drops. Agree on hand signals before moving.
If you are still building basic trail judgment, read how to prepare your Jeep for off-road trails before tackling technical terrain.
Four-wheel-drive mode helps only if your tire placement makes sense. Lockers, low range, and traction control cannot fully save a poor line that unloads tires or drags the belly over a high point.
How do you read terrain for traction and clearance?
You read terrain by separating the trail into grip zones, danger zones, and setup zones before driving. Grip zones are firm, textured, and predictable. Danger zones include deep ruts, loose marbles, undercut ledges, hidden holes, and high center points that can contact the underbody.
A beginner should walk tricky sections when safe. On foot, you can see crown height, rut depth, rock shape, and soil texture better than from the driver's seat.
Terrain clues that change your tire path
| Terrain clue | What it usually means | Better beginner line |
|---|---|---|
| Shiny wet rock | Low friction | Place tires on rougher edges or dry patches |
| Loose gravel over hardpack | Sudden wheelspin | Keep momentum steady and avoid sharp steering |
| Deep center crown | High-center risk | Straddle carefully only if clearance allows |
| One deep rut | Sidewall and diff risk | Ride the high edge if the trail is wide enough |
| Exposed roots | Slippery when wet | Cross gently at an angle with light throttle |
| Narrow shelf trail | Little recovery room | Keep uphill tires planted and avoid sudden inputs |
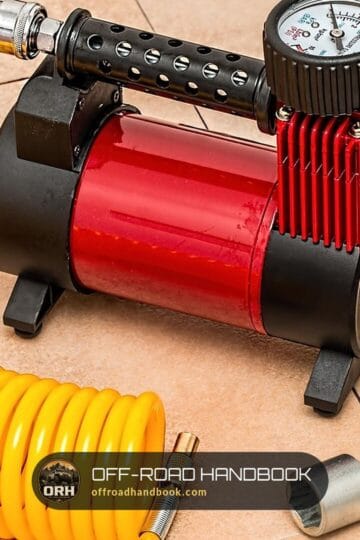
Tire pressure changes the margin for error too. Aired-down tires wrap around rocks and keep grip, while tires at highway pressure tend to skate and bounce off the same obstacle.
What your vehicle is telling you
Listen for scraping, wheelspin, and suspension unloading. A light scrape on a skid plate may be acceptable on a planned rock line, but a hard hit near the differential, rocker panel, or transmission area means you picked the wrong height relationship.
If your Jeep or 4x4 hesitates, surges, or refuses to move normally, do not blame the trail first. Mechanical issues can look like poor technique, so vehicle health matters before any technical route.
How should beginners handle ruts, rocks, climbs, and narrow trails?
Beginners should handle common obstacles by slowing down, placing tires on stable high points, and avoiding sudden throttle or steering. The safest line usually keeps the vehicle level, protects the lowest parts, and preserves a clean exit path instead of attacking the obstacle straight on.
Different terrain needs different habits. A rut line that works in mud may be wrong on rocks, and a hill-climb line that works dry may fail after rain.
Line choice by obstacle type
| Obstacle | Main risk | Beginner tactic |
|---|---|---|
| Ruts | Sliding into the rut or dragging diffs | Ride the high side when safe, cross only with a planned angle |
| Rocks | Tire cuts and underbody hits | Put tires on rocks, not the belly between them |
| Loose climbs | Wheelspin and sideways drift | Use low range, steady throttle, and the straightest stable line |
| Mud holes | Hidden depth and suction | Probe first, avoid if depth is unknown |
| Narrow trails | Body damage and poor escape options | Fold mirrors if needed, crawl, and use a spotter |
| Descents | Brake lockup and loss of steering | Use low gear, controlled speed, and a straight exit |
Vision leads the vehicle. If you stare at the rut, rock or drop-off, your hands often steer toward it.
How do approach, breakover, and departure angles affect line choice?
Approach, breakover, and departure angles decide whether your bumper, belly, or rear end will hit before your tires clear the obstacle. Beginners should choose diagonal entries, tire-on-high-point paths, or alternate lines when a straight approach would exceed the vehicle's clearance.
Approach angle: how steep an obstacle your front bumper can meet without contact.
Breakover angle: how much crest your vehicle can pass without high-centering.
Departure angle: how steeply your rear can leave without dragging.
Clearance decisions beginners should make early
- Use diagonal approaches carefully. They can improve bumper clearance, but too much angle may lift a tire.
- Put tires on tall rocks when safe. Tires are designed to climb; low-hanging metal parts are not.
- Avoid straddling sharp rocks. That puts the hazard under your lowest parts.
- Watch the rear. Many beginners clear the front and forget the hitch or rear bumper.
- Stop before scraping becomes impact. A controlled pause is cheaper than forced momentum.
Spotter communication that prevents damage
A spotter should stand where the driver can see them and never between the vehicle and a fixed object. Use simple signals for driver, passenger, stop, slow, and back up.
The driver should follow one spotter only. Multiple voices create hesitation, and hesitation on rocks or loose climbs often leads to wheelspin.
What should beginners practice next after learning line choice?
Beginners should practice line choice on mild terrain first, then add ruts, rocks, and climbs in small steps. The goal is not to prove the vehicle can make it; the goal is to build repeatable judgment that works when the trail gets wet, narrow, or unfamiliar.
A simple 30-minute practice session
- Pick a safe open area with small rocks, shallow ruts, or uneven dirt.
- Walk one short section and choose three tire targets.
- Drive it slowly with windows down so you can hear tire and skid contact.
- Repeat with a different line and compare comfort, traction, and clearance.
- Add a spotter and practice hand signals before you need them.
- Air up and inspect tires, wheels, skid plates, and suspension afterward.
FAQ: beginner line-choice questions
Follow existing tracks only when they are legal, stable, and not badly rutted. A track made by a lifted vehicle on larger tires may be a poor fit for your stock Jeep, ATV, or SUV.
Crawling is usually better for rocks, ruts, and tight trails because it protects parts and keeps control. Momentum helps on sand or loose climbs, but too much speed reduces steering precision.
Turn around when you cannot see the exit, cannot protect the underbody, or do not have recovery support. Pride is not a recovery plan.
Lockers improve traction, but they do not add clearance or judgment. Bad tire placement can still damage sidewalls, diffs, bumpers, and body panels.
The short version
Smart line choice is a skill you can practice every trail day: stop, scan, choose tire targets, protect clearance, and drive only as fast as your eyes can plan. Practice on easy terrain first, then build toward ruts, rocks, climbs and narrow routes with a spotter.
For your next trip, review one safety guide, inspect your vehicle, and choose a trail that lets you practice clean lines instead of forcing risky recoveries.
Related guides
- How to Read ATV Tire Size: A Simple Guide to Every Number and Letter
- Off-Road Spotting Signals for Beginners: The Essential Hand Guide
- Off-Road Tire Pressure Guide: PSI for Sand, Rocks, Mud and Snow

I'm Suryashankar Dasgupta, the founder of Off-Road Handbook. I've been off-roading for years in the USA, including California and Texas, and have ridden mountain and desert terrain abroad. I've also driven a Jeep Compass for more than seven years, so I know the day-to-day side of Jeep ownership first-hand, from the Uconnect screen to the warning lights. Every guide here is researched from manufacturer owner's manuals, NHTSA recall and service-bulletin records and other trusted sources, checked against them before it is published, and corrected when we find a mistake. You can read how we work in our editorial policy: https://offroadhandbook.com/editorial-policy/
Like our off-road guides? Add Off-Road Handbook as a Google Preferred Source so our latest Jeep, ATV, UTV, trail, recovery, and off-road troubleshooting articles can appear more often in your Google Search experience.
Add us as a Preferred Source