Polaris Ranger 700 XP Problems: 7 Common Issues and Fixes
Last updated on October 18th, 2026 at 12:29 am
This post contains Amazon affiliate links. As an Amazon Associate I earn from qualifying purchases, at no extra cost to you.
Most Polaris Ranger 700 XP trouble comes from the fuel-injection side: an engine that hesitates, bogs or dies under load. The Polaris service manual works in a set order: blink codes, air leaks, fuel pressure (39 psi, plus or minus 3), then the throttle position sensor (TPS).
The rest of the list is a crank-sensor no-start, a starter that will not turn, all-wheel drive that will not engage and PVT belt trouble.
The numbers below come from the Polaris Ranger XP 700 4x4 service manual (2007 and 2008 machines, per the manual's model list). Other years can differ, so confirm anything critical for your VIN. For the newer, bigger Ranger, see our Polaris Ranger 1000 problems guide.
Ranger 700 XP problems at a glance
| What you see | Check first (free) | Next step | Who fixes it |
|---|---|---|---|
| Hesitates, bogs or backfires | Blink codes; intake boot, airbox and filter | Fuel pressure, then TPS sweep test | You, then dealer for the ECU |
| Dies or cuts out under load | Fuel level, tank vent, filter | Fuel pressure; 7 V at the pump | You; new tank and pump assembly |
| Cranks but will not start (code 21) | Battery and sensor connector | Crank sensor 560 ohms | You or dealer |
| Starter will not turn the engine | Battery at 12.4 V or more | Voltage drop under 0.1 V per cable | You, then shop for the starter |
| AWD will not engage | Voltage at the front coil | Coil 22.8 to 25.2 ohms, plate wear | Dealer |
| Slipping, burnt smell, erratic rpm | Parking brake fully released | Sheaves, belt wear and alignment | You or dealer |
| Runs hot | Radiator mud and coolant level | Temperature sensor and fan test | You |
Pick your symptom below for the same checks in order, free ones first. It only repeats what is in the manual and the sections that follow.
The checker cannot read codes or inspect the machine. Treat it as an ordered checklist and use the sections below for the actual tests.
1. Hesitation, bogging and dying under load
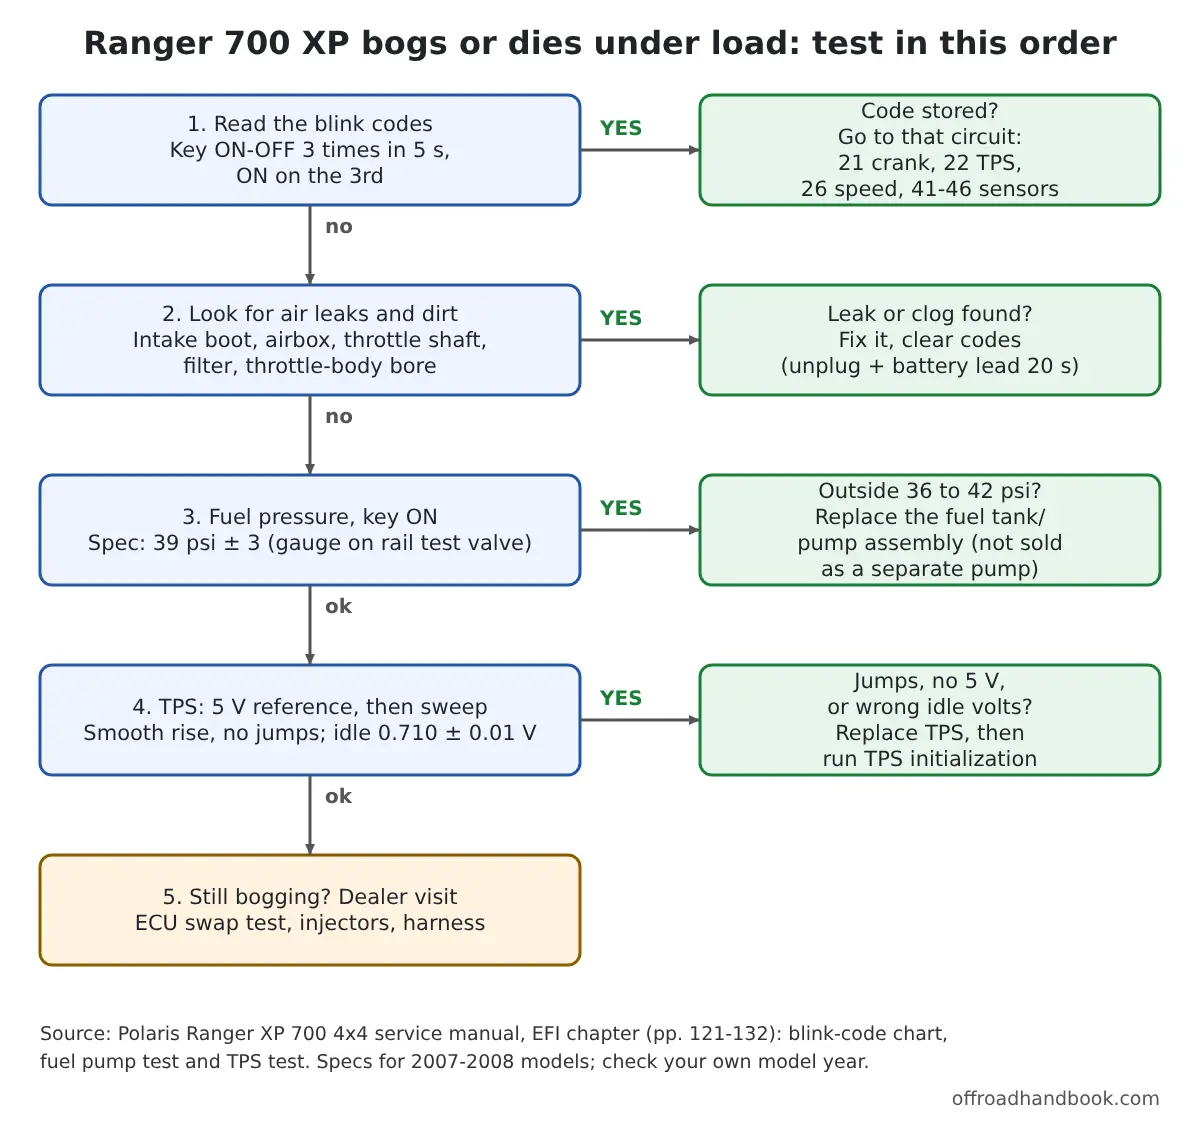
Hesitation, bogging, backfiring through the intake or exhaust, low power and surging all point to a lean mixture. The manual lists the causes: an empty tank, a restricted or wrongly routed tank vent, restricted fuel lines or injectors, a plugged filter, a dead pump, air leaks, or a wrong throttle stop screw setting. (service manual p. 132)
Air leaks show up at the throttle shaft, intake ducts, airbox and air cleaner cover, so start with a visual check. Owner threads often name a cracked airbox boot or throttle-body adapter, which is an owner report rather than a Polaris statement, but a cracked rubber boot is easy to spot.
A rich mixture looks different: fouled plugs, black sooty exhaust and loading up. The manual blames a dirty air filter, restricted intake duct, old fuel, a fouled plug, a wrong TPS setting or a failed injector. Black smoke is not a low-fuel-pressure symptom, whatever some competing guides say.
Idle speed matters too. The manual says an idle above 1300 rpm warm means a stuck or misadjusted throttle cable or wrong stop screw, and below 900 rpm warm points to a plugged air filter, a leaking injector or a dragging belt.
2. Low fuel pressure
If the Ranger runs at idle but cuts out under load or around 25 mph, test fuel pressure before buying parts. The spec is 39 psi, plus or minus 3, and the manual says to replace the whole tank assembly if it is out of range.
- Remove the cap from the fuel test valve on the fuel rail.
- Connect the Polaris pressure tester (PN PU-43506) and put the hose in a container for gasoline.
- Turn the key on so the pump runs, and read the pressure. Then turn the key off and relieve pressure with the tester valve.
- If the pump never ran, unplug it and check for at least 7 V across terminals A and C with the key on.
- Below 7 V, test the battery, ignition switch, harness and ECU. At 7 to 14 V, check pump continuity with the key off.
The pump and tank are one non-serviceable assembly with an internal 60-micron filter, rated at 25 liters per hour minimum at 39 psi. Below 7 V during starting the ECU will not run the system, so a weak battery can look like a fuel problem. (p. 122) (p. 121)
Gasoline is flammable and under pressure. Work outdoors with no sparks, wear goggles, and keep the hose in a container. A generic EFI gauge, such as one from this Amazon search for fuel pressure test kits, is only useful if its fitting matches the rail test valve, so confirm that first. Polaris publishes no repair prices, so ask a dealer to quote the assembly by VIN.
3. TPS faults (code 22)
The TPS reports throttle angle to the ECU, which uses it to set fuel and ignition. It is non-serviceable: if it fails the test, replace it. Before blaming it, remove the intake boot and look for carbon buildup in the throttle bore, and clean the bore if needed. (p. 127)
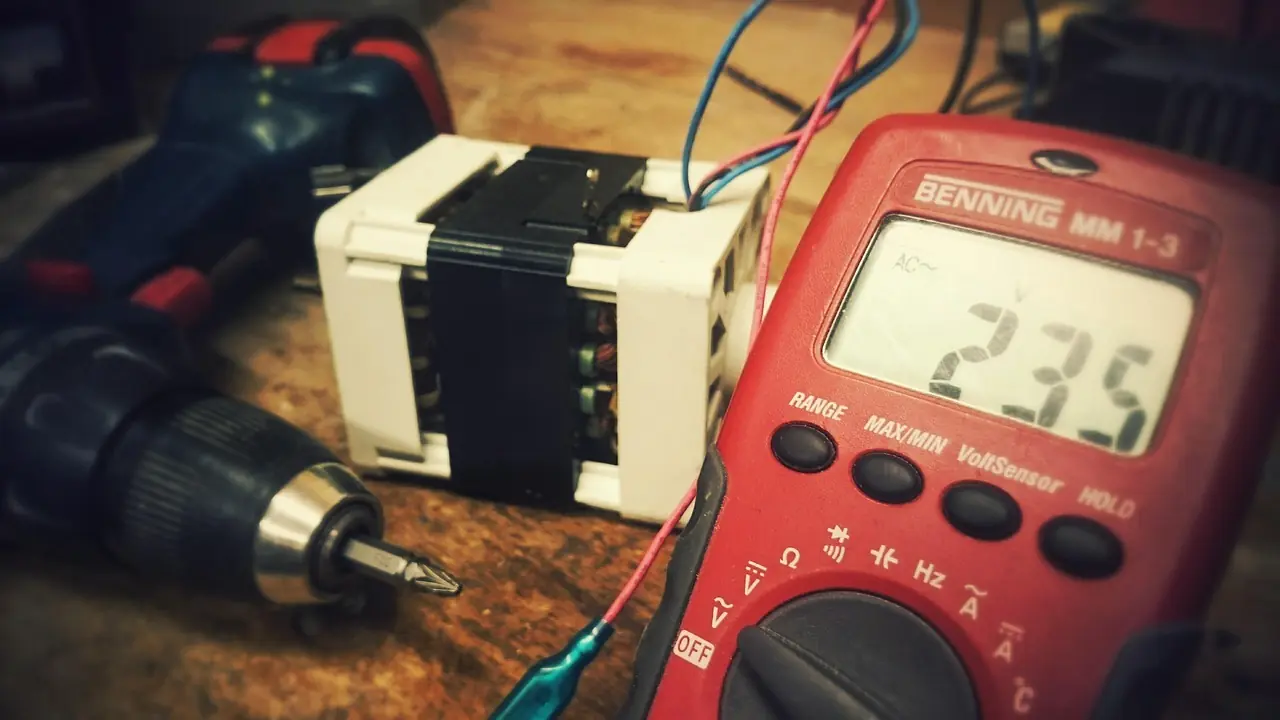
Polaris tests it with the TPS Test Adapter Harness (PU-47082) and a new 9-volt battery. A basic digital multimeter reads the voltages, but the adapter harness is the safe way to reach the sensor wires.
- Reference check: with the adapter on, the reading between the black and red ports should be 4.99 to 5.01 V. A low reading usually means a weak 9 V battery.
- Sweep test: red probe in the yellow port, black in the black port, meter on DC volts. Open and close the throttle slowly. Voltage should rise smoothly with no jumps or dropouts.
- Idle check: at idle the voltage should be 0.710 V, plus or minus 0.01. If it is not, run the initialization below.
The factory sets the TPS position. Do not loosen the mounting screw unless you are ready to recalibrate: if the sensor is repositioned, loosened or replaced, it must be initialized or the ECU will mis-set fuel.
How to initialize the TPS
- Engine off. Remove the cover and disconnect the throttle cable from the throttle cam.
- Back out the air flow screw until it no longer touches the cam, so the plate seals the bore. Open and close the plate by hand without snapping it shut.
- With the adapter and a new 9 V battery attached, read the zero offset. It should be 0.528 V, plus or minus 0.01.
- If not, loosen the TPS mounting screw and rotate the sensor until it reads 0.528 V. Retighten and confirm the reading did not move.
- Turn the air flow screw until the meter reads 0.710 V, plus or minus 0.01.
- Reconnect the TPS lead and the throttle cable, install the cover and set cable freeplay.
The manual gives no torque for the TPS screw. To replace the sensor, remove the seat base, unplug it, loosen and rotate the throttle body to reach the screw, swap the sensor and then initialize. (p. 128) (p. 129)
4. Cranks but will not start, or stalls (codes 21 and 23)
With the key on, the ECU runs the fuel pump to pressurize the system. If you do not start the engine promptly, it shuts the pump off and the check engine light comes on until the engine turns over four revolutions. So a no-start with a silent pump is worth a voltage check at the pump before anything else.
Code 21 means loss of crank synchronization. The crank sensor is sealed and non-serviceable, but easy to test with the main harness unplugged from the ECU: it should read 560 ohms, plus or minus 10 percent, at 68 F. If that is right, check the sensor mounting and air gap, the toothed ring gear for damage or runout, and the flywheel key. (p. 126)
To replace it, use a 6 mm hex wrench, lightly oil the O-ring and torque the bolt to 25 in-lbs. Code 23 is an ECU RAM error. Polaris says never to open the ECU and to get factory authorization before replacing it, though a known-good ECU from the same model can be swapped in temporarily to test.
Some older articles blame melted ECU connector pins for random stalls. The manual does not mention that, so treat it as an owner theory. Unplugging the connector to look for green corrosion or heat discoloration still costs nothing.
5. Starter will not turn the engine
Make sure the engine turns freely by hand first, then use a digital multimeter. The manual wants 12.4 V or more at the battery. Lower means charge or replace it before testing anything else. (p. 321)
- Disconnect the coil wire at the starter solenoid and check that the harness wire reads battery voltage with the key on and the button pressed.
- Check both sides of the circuit breaker, ignition or stop switch and starter button. Both sides should show the same voltage.
- Voltage drop test while pressing the button: battery-to-solenoid cable, then solenoid-to-starter cable. Each reading should be under 0.1 V.
- Only if all pass, remove the starter and test the solenoid coil and ground path on the bench.
A drop above 0.1 V means a dirty or failing cable end, not a bad starter. Clean and tighten it first, because that costs nothing. The manual has no test for a grinding starter drive, so that diagnosis is a shop call.
6. All-wheel drive will not engage
The Ranger 700 XP has a front gearcase with an armature plate and an electric coil. The manual's "AWD will not engage" test runs in four steps, and the first two need only a meter. (p. 196)
- Measure coil resistance between the gray and brown/white wires: 22.8 to 25.2 ohms.
- Check supply voltage at the same wires: at least 11 to 12 V.
- Inspect the armature plate. A healthy one shows one or two distinct wear bands, one inside the other. A single band, or wear between them, points to the coil area. An interrupted band can mean a warped plate and intermittent AWD.
- Check coil seating. The coil top should sit below the U-shaped insert pressed into the cover, because that insert sets the pole gap. If the coil sits above it, order a new plate cover assembly.
Steps three and four mean opening the front gearcase, so most owners will hand those to a dealer. Gearcase and transmission oil are a yearly change in the manual's pre-ride chart, which is cheap insurance. (p. 20)
7. Belt slipping, erratic rpm and hard shifting
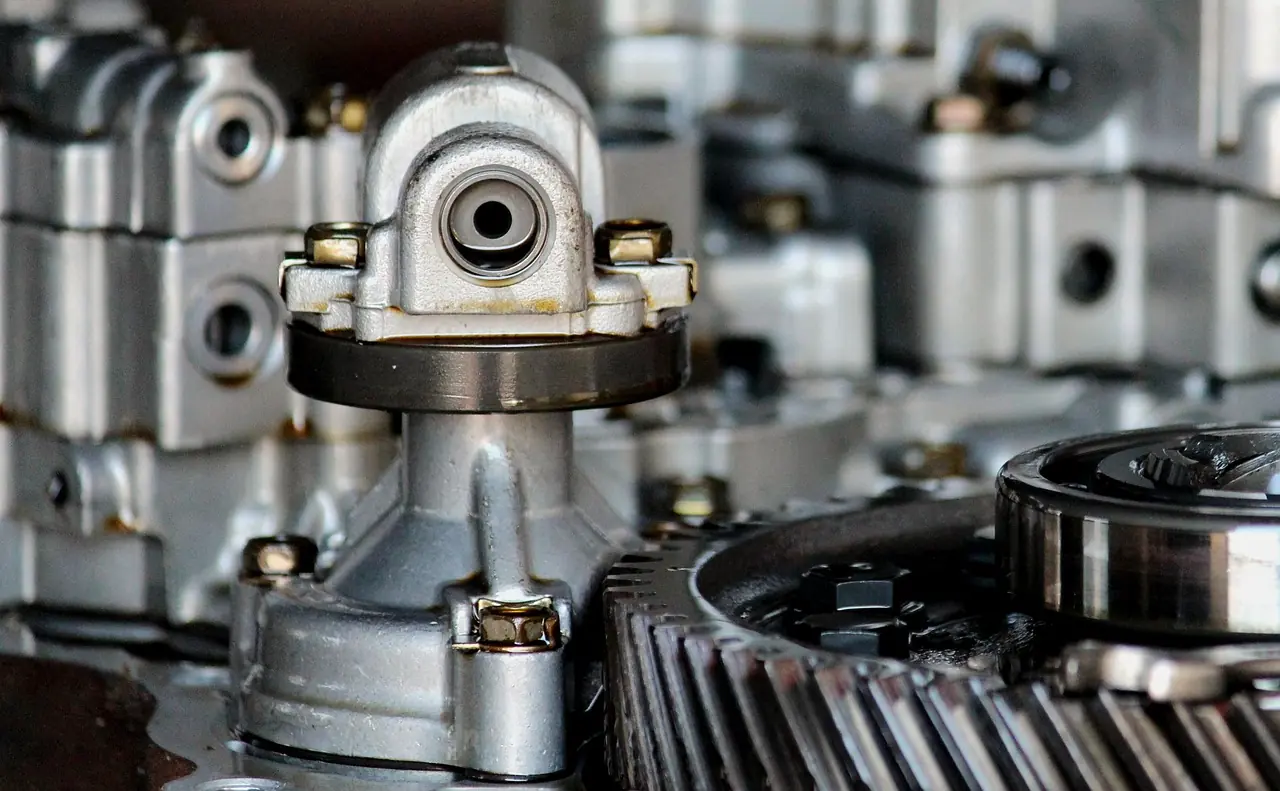
The manual's clutch troubleshooting page ties each symptom to specific causes. Erratic rpm during acceleration points to an unevenly worn belt, a bad driven clutch or a grooved sheave. A belt with burnt thin spots points to a dragging brake or slow, easy clutch engagement, so use quick, positive throttle. (p. 179)
Greasy sheaves cause slip and high rpm: clean them with denatured alcohol or brake cleaner and fit a new belt. A belt that turns over means clutch alignment is out, an engine mount is broken or loose, or the machine was held on throttle while stationary or overloaded.
If the lever is hard to move, the manual says to check idle speed, PVT alignment, transmission oil, belt deflection, linkage fasteners and worn rod ends. To isolate the transmission, disconnect the linkage at the bellcrank and select each range by hand. (p. 255)
Severe use, meaning frequent mud, water or sand, extended idling or heavy low-speed work, cuts maintenance intervals by half. For more on belts and heat across ATVs and UTVs, see our ATV and UTV troubleshooting guide. (p. 19)
Overheating, the fan and air filter
The engine temperature sensor mounts in the cylinder head and the ECU uses it to run the fan. To check the circuit, unplug the sensor: the fan should run and the cluster should show HOT. If so, the fan and wiring are fine. If the sensor circuit is open, the fan defaults to on. (p. 130)
The sensor should read about 2.5 kilohms at 68 F and 0.186 kilohm at 212 F. To replace it, drain coolant below the sensor, use a light coat of thread sealant and torque it to 17 ft-lbs. The pre-ride chart also says to inspect the air filter often, drain the airbox sediment tube when you see deposits, and change coolant every two years.
Trouble codes on the Ranger 700 XP
To read stored codes, put the transmission in neutral and set the parking brake, then turn the key ON and OFF three times within five seconds, leaving it ON on the third. "Wait" shows while the ECU searches, then codes appear one at a time in order, and "End" shows when done. Clear them by disconnecting the positive battery lead for 20 seconds. (p. 131)
| Code | Circuit | SAE code(s) |
|---|---|---|
| 21 | Crankshaft sensor, loss of synchronization | P0335 |
| 22 | Throttle position sensor, short to ground or battery | P0122, P0123 |
| 23 | ECU RAM error | P0601 |
| 25 | Transmission input, invalid gear | P0914 |
| 26 | Vehicle speed sensor, implausible signal | P0500 |
| 41 | Intake air temperature sensor | P0113, P0112 |
| 42 | Engine temperature sensor | P0117, P0118 |
| 45 / 46 | Barometric pressure sensor, low / high input | P0107 / P0108 |
| 51 / 52 | Injector 1 / injector 2 | P1260, P0261, P0262 / P1263, P0264, P0265 |
| 54 / 55 | Engine temperature lamp / diagnostic lamp circuit | P0655, P1657, P1658 / P1651, P1652, P1653 |
| 56 | Fuel pump relay | P1231, P1232, P1233 |
| 58 | Cooling fan | P1480, P1481, P1482 |
If a code says 26, check the speed sensor first. Tires of the wrong size also skew speed readings, and our tire size calculator shows how far off your readings run. Pick any code below for the circuit and the first check.
The lookup repeats the manual's table and the tests above. A code shows which circuit is bad, not which part to buy, so test before replacing anything.
Numbers from the service manual
| Item | Spec | Manual page |
|---|---|---|
| Fuel pressure | 39 psi, plus or minus 3 | p. 122 |
| Pump minimum flow | 25 L/h at 39 psi | p. 121 |
| Minimum voltage at pump | 7 V (ECU will not run it below 7 V while starting) | p. 122 |
| TPS reference voltage | 4.99 to 5.01 V | p. 127 |
| TPS zero offset / idle voltage | 0.528 V / 0.710 V, each plus or minus 0.01 | p. 128 |
| Crank sensor resistance | 560 ohms, plus or minus 10 percent, at 68 F | p. 126 |
| Crank sensor bolt torque | 25 in-lbs (2.8 Nm) | p. 126 |
| Engine temperature sensor | 2.5 kilohms at 68 F, 0.186 kilohm at 212 F | p. 130 |
| Temperature sensor torque | 17 ft-lbs (23 Nm), thread sealant | p. 130 |
| ECU screw torque | 10 in-lbs (1.1 Nm) | p. 121 |
| Rev limit | 6,200 rpm hard; 5,900 rpm soft in low, neutral and reverse | p. 121 |
| Idle speed warm | Above 1,300 rpm too high; below 900 rpm too low | p. 132 |
| Starter test: battery / cable drop | 12.4 V or more / under 0.1 V | p. 321 |
| AWD front coil | 22.8 to 25.2 ohms; 11 to 12 V minimum | p. 196 |
Recalls and buying a used 700 XP
CPSC recall 09-762 covered the 2009 Ranger 700 EFI Crew and 6x6 for a tail light harness short that could overheat. The standard 700 XP was not on that model list, but check your VIN with Polaris or a dealer. CPSC 09-762
Before buying a used one, read the blink codes, test fuel pressure, run the TPS sweep, confirm AWD engages, and inspect the belt and sheaves. Those five checks cover the manual's common failure points in about an hour.
FAQs
With the transmission in neutral and the parking brake set, turn the key ON and OFF three times within five seconds and leave it ON on the third. Codes show one at a time on the cluster, then End.
39 psi, plus or minus 3, according to the Polaris service manual. Out of range means replacing the tank and pump assembly.
0.710 V, plus or minus 0.01, tested with the Polaris adapter harness. The reference voltage should be 4.99 to 5.01 V.
Start with fuel pressure and the tank vent, then air leaks and the TPS sweep test. Low pressure under load is the most common finding, and the pump is replaced as part of the tank assembly.
Related guides
- Polaris Ranger 1000 Problems: 7 Common Issues and How to Fix Them (newer Ranger 1000 and Crew 1000, with a fault code lookup)
- Polaris General 1000 Problems: 8 Common Issues and Fixes (General 1000 and General 4 1000, with a recall checker)
- Polaris Sportsman 450 Problems: 7 Common Issues and Fixes
- ATV and UTV Troubleshooting: Bogging, No-Start, Heat and Belts

I'm Suryashankar Dasgupta, the founder of Off-Road Handbook. I've been off-roading for years in the USA, including California and Texas, and have ridden mountain and desert terrain abroad. I've also driven a Jeep Compass for more than seven years, so I know the day-to-day side of Jeep ownership first-hand, from the Uconnect screen to the warning lights. Every guide here is researched from manufacturer owner's manuals, NHTSA recall and service-bulletin records and other trusted sources, checked against them before it is published, and corrected when we find a mistake. You can read how we work in our editorial policy: https://offroadhandbook.com/editorial-policy/
Like our off-road guides? Add Off-Road Handbook as a Google Preferred Source so our latest Jeep, ATV, UTV, trail, recovery, and off-road troubleshooting articles can appear more often in your Google Search experience.
Add us as a Preferred Source